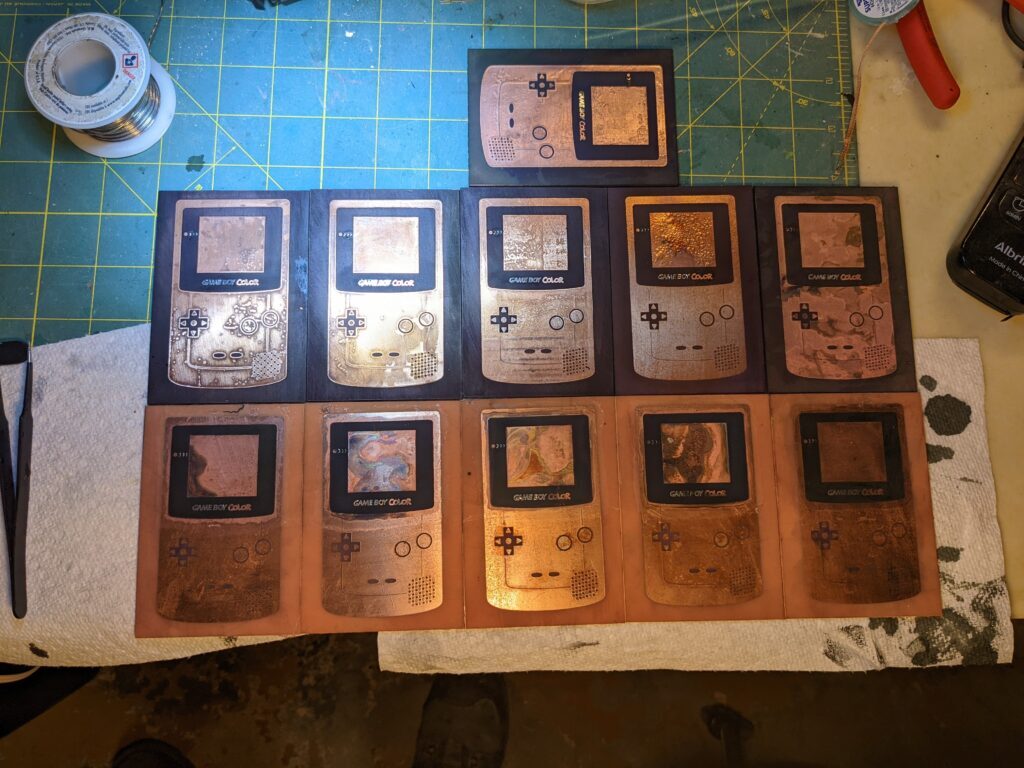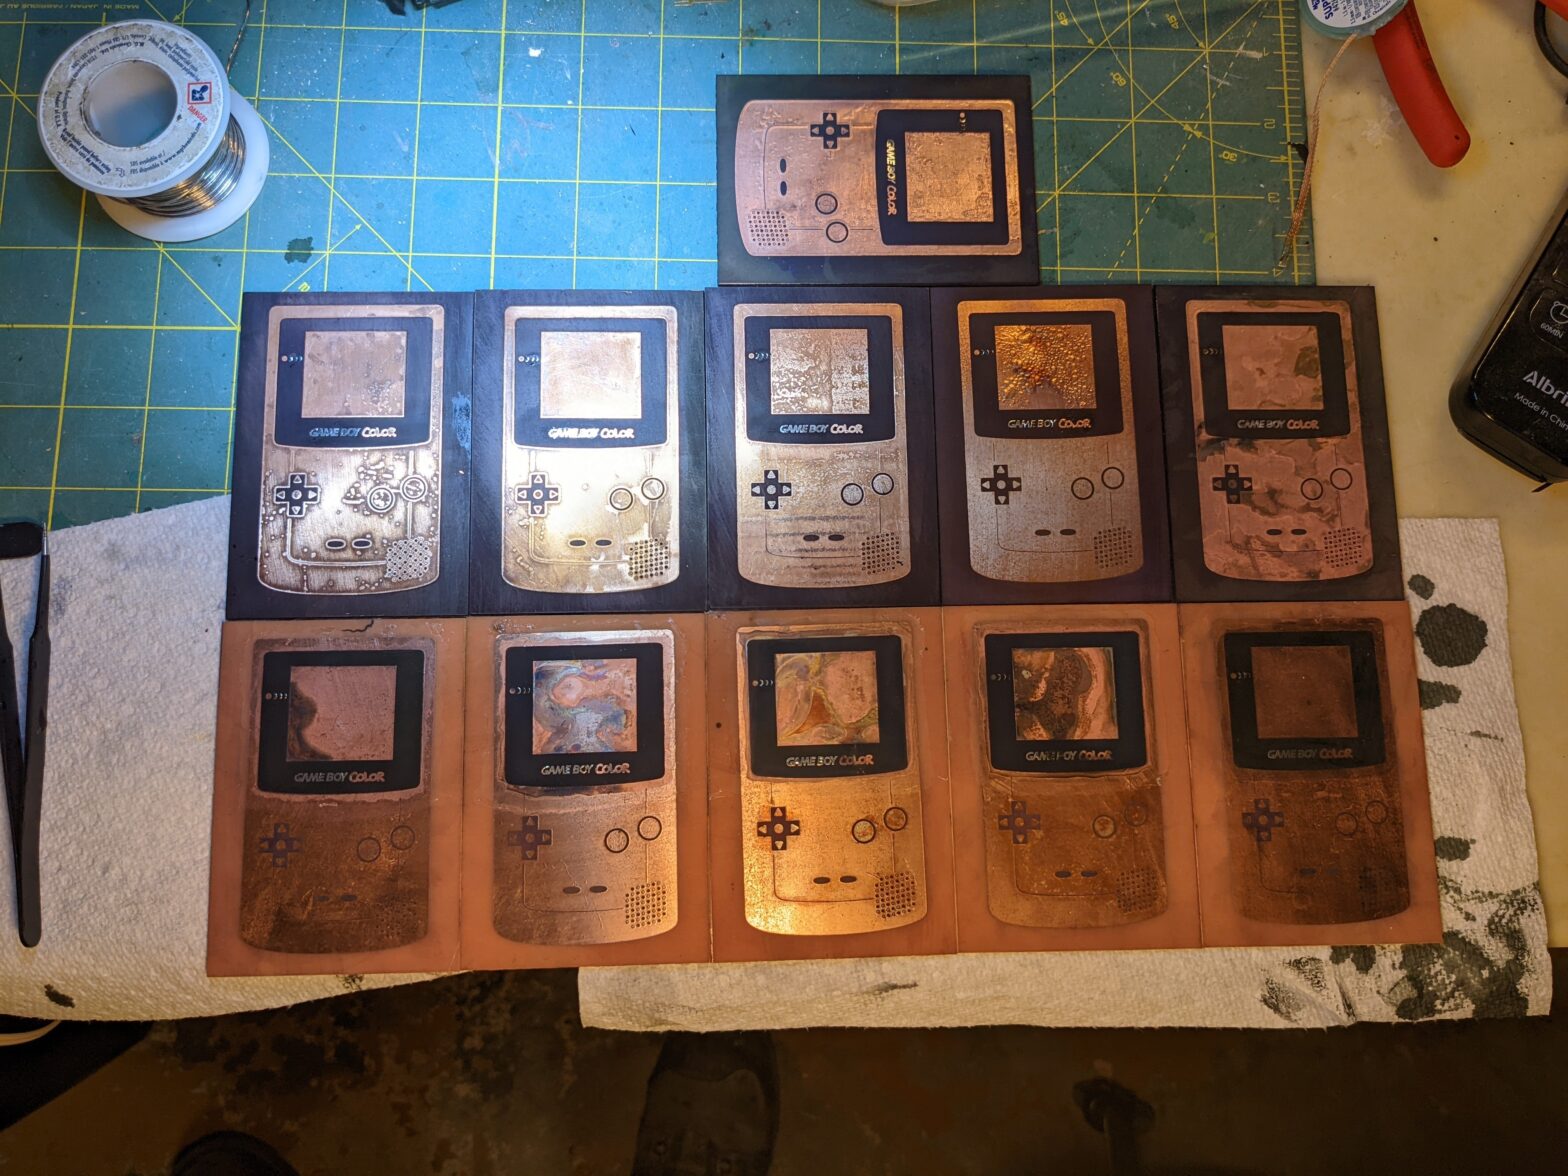
I have tried every possible tutorial I could find for dyeing home-made circuit boards and I’ve finally got a technique that I’m satisfied with. My standards were fairly high, I wanted to get a uniform color that isn’t too blotchy, and I wanted to be able to selectively dye areas of the board. There are a few existing tutorials online that produce lackluster results.
One involves using sharpies and quite frankly sucks. It doesn’t stick well and leaves blotchy results. Also, sharpies are secretly blue.
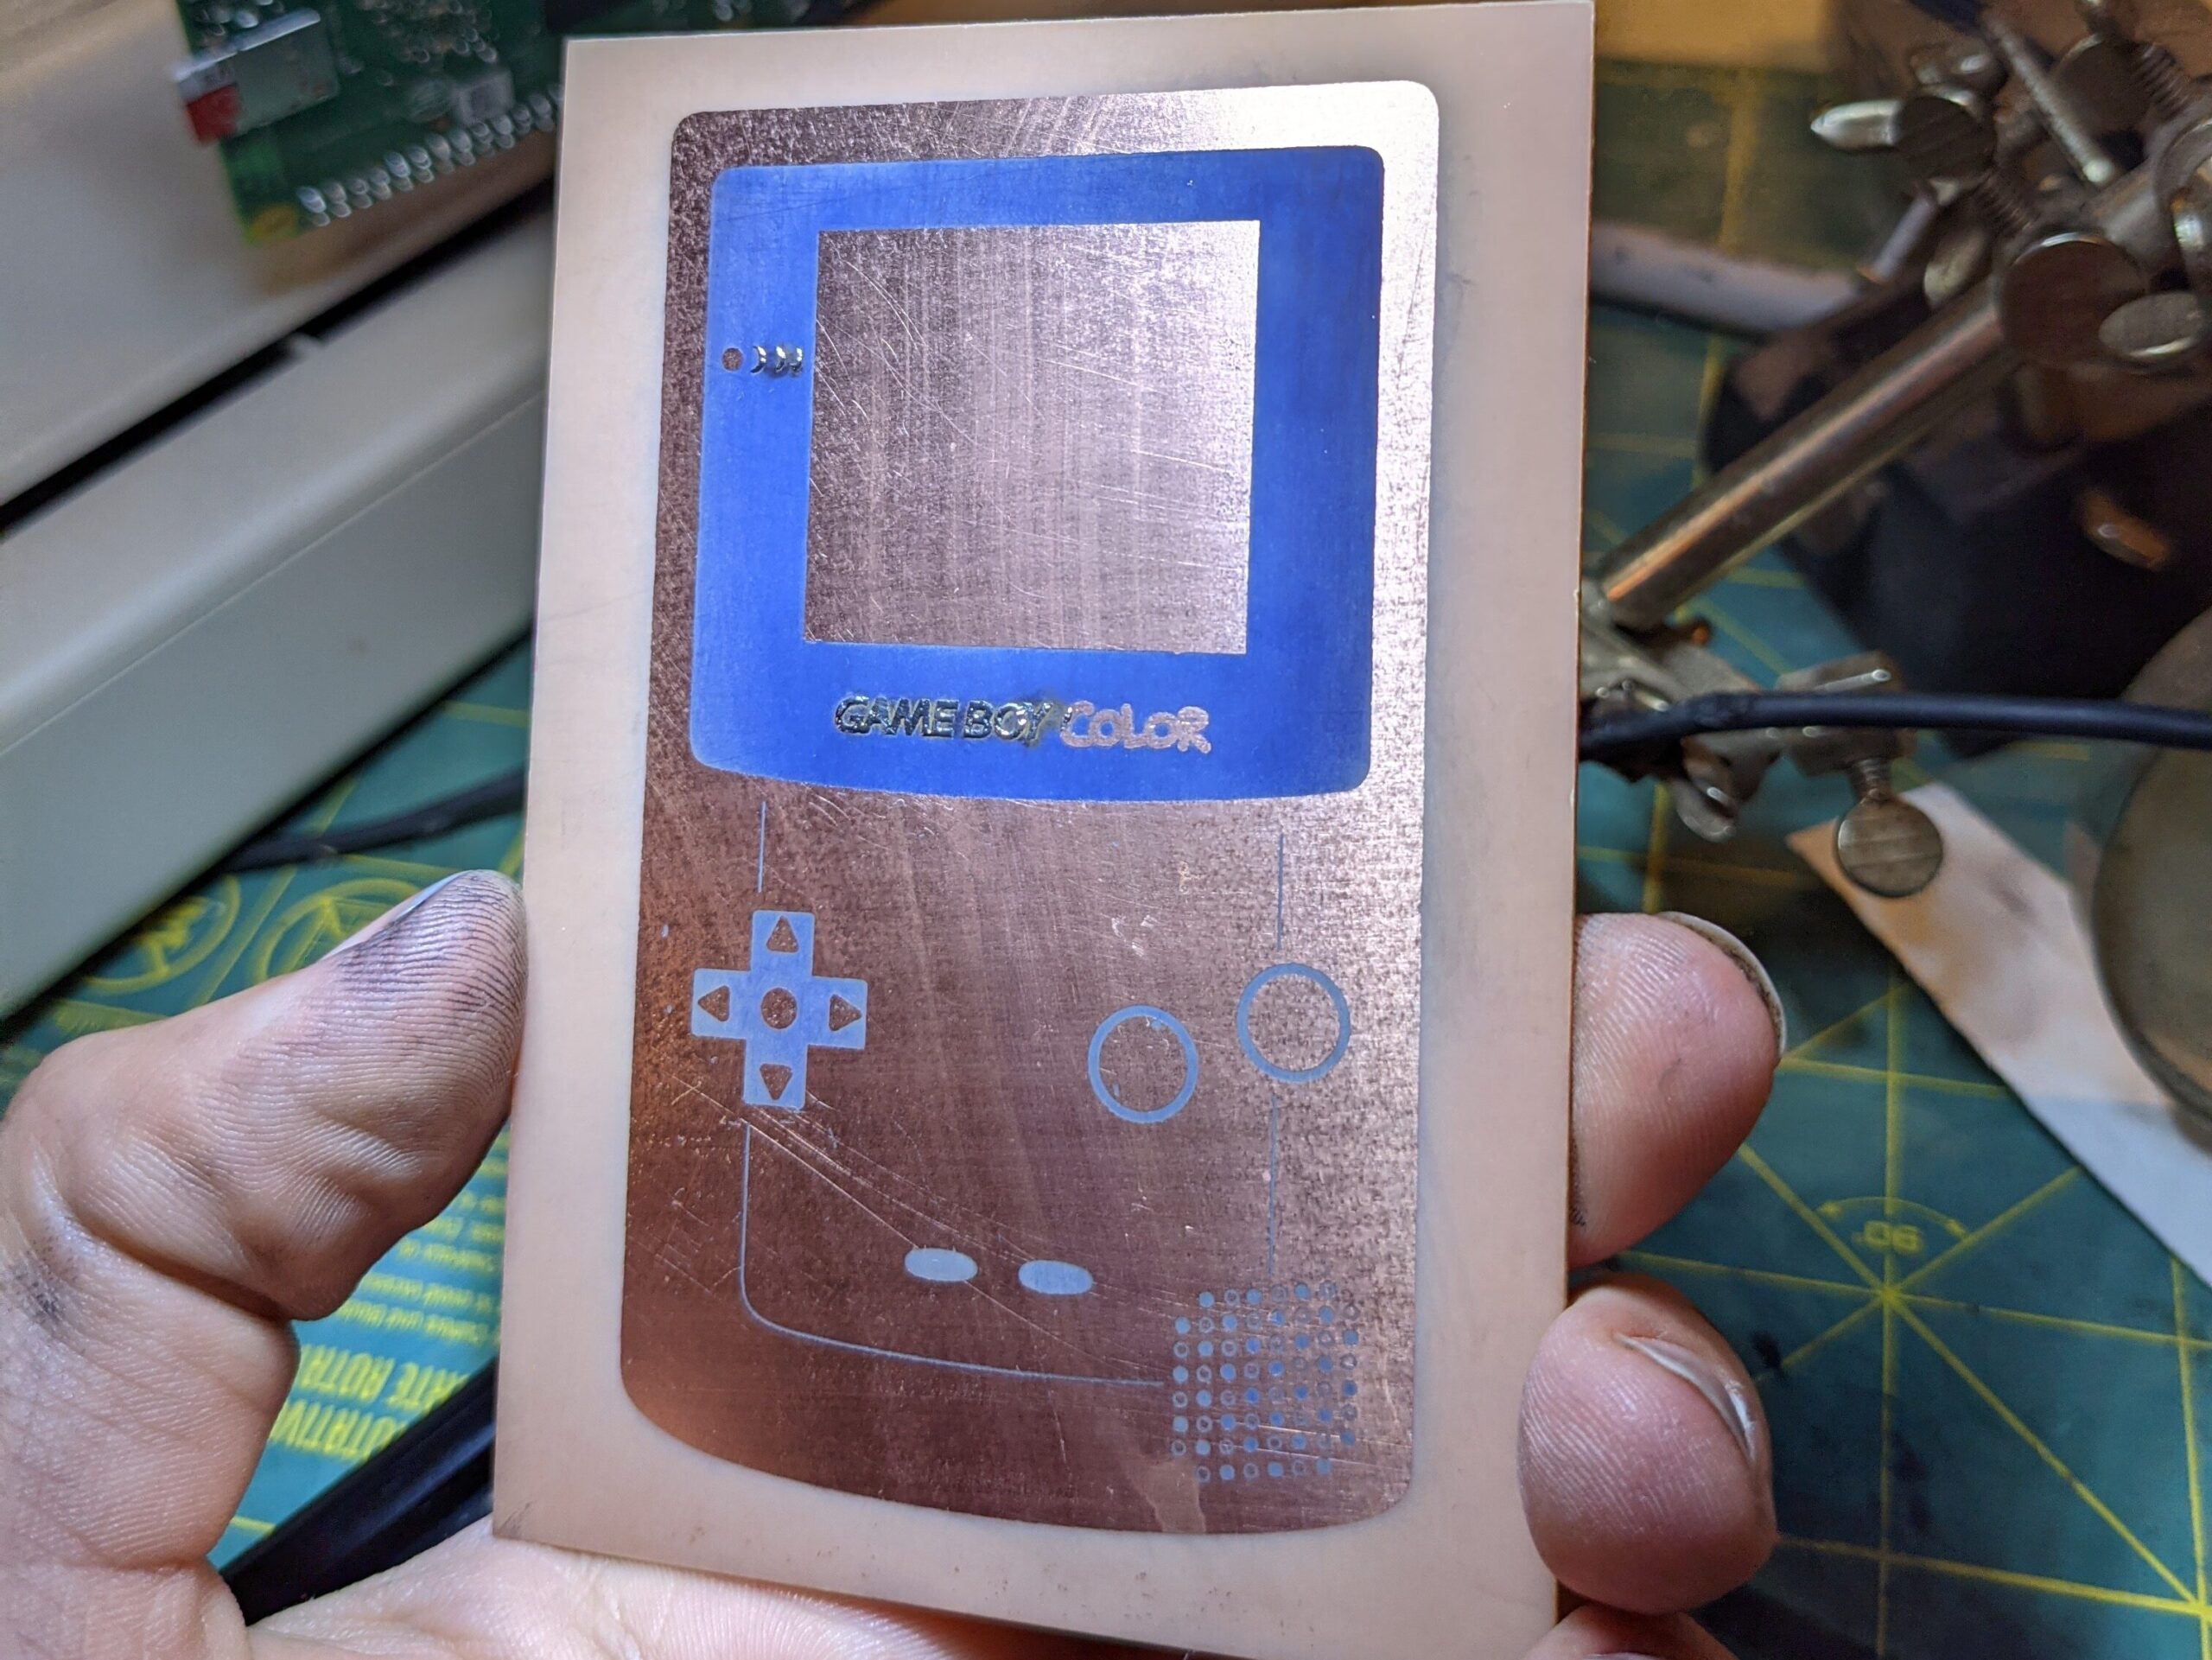
The sharpie method was attractive to me because it allows dyeing different areas of the board in different colors.
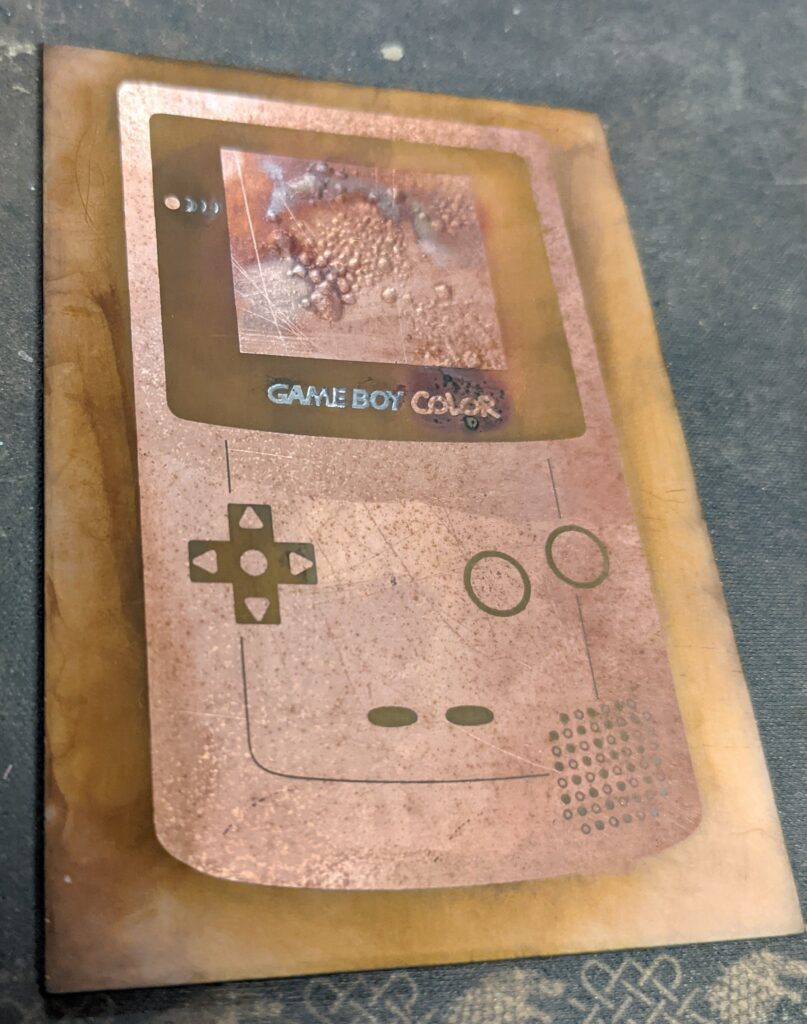
The other method online involves making a concentrated solution of RIT dye and boiling the board in it for several hours, then letting it sit overnight. This didn’t work at all for me and is quite time consuming. It may or may not come down to the type of PCB material, I don’t know.
So, being unsatisfied with these methods, I set out to solve the dyeing problem once and for all. A few highlights include: injecting rit dye directly into a sharpie to try and get a better color, dissolving my cooking pot with a solution that I named “forbidden soup”, and permanently staining my workbench and floor with saidforbidden soup. You can see those experiments in my twitter thread: https://twitter.com/RealTimeKodi/status/1469101619673538566
After several experiments, I finally came to a repeatable method that offers stunning, durable results and is quite easy and fairly safe.
To dye PCBs using the forbidden soup method you’ll need:
- Acetone
- 91% IPA or other alcohol based solvent
- paper towels(lots)
- Rit liquid or powdered dye in desired color
- An acetone resistant container(glass or polypropylene work well) NO ALUMINUM it reacts poorly to the soup
- Hot glue gun (if doing selective dyeing)
- fine grit sandpaper or steel wool
The procedure itself is fairly straightforward:
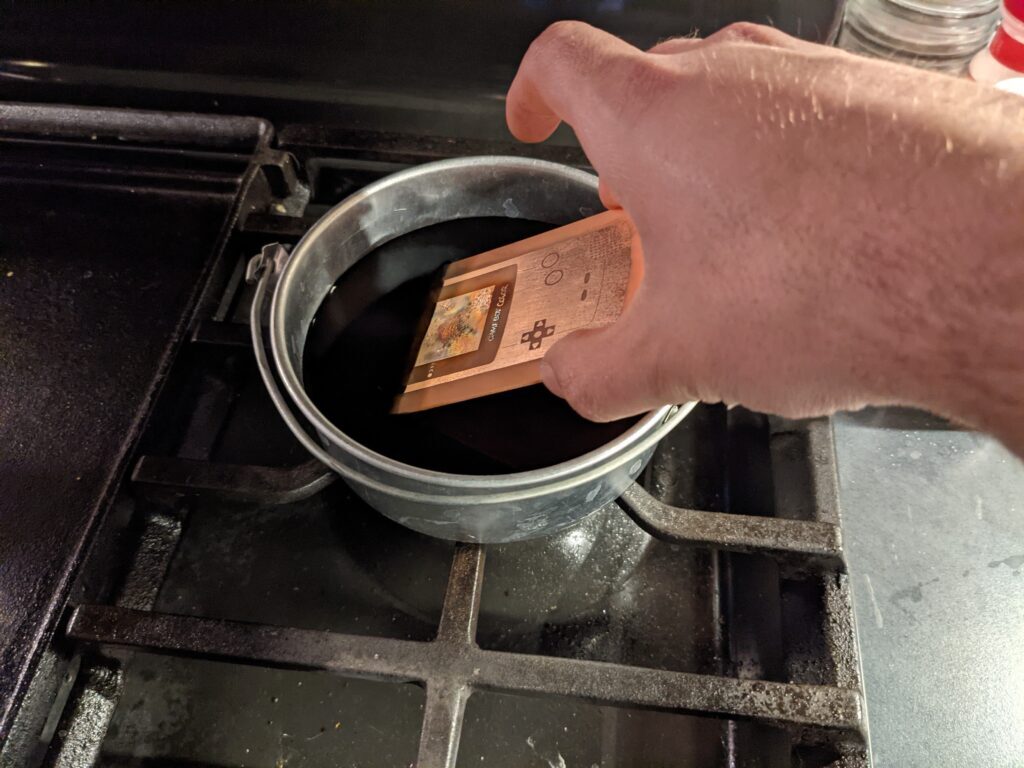
- In an acetone-safe container, mix 2Oz acetone with 1oz Rit Dye. Solution should be very opaque
- (Optional) Use hot glue to create a dam around the area you wish to dye, then fill the area with the dye acetone mixture
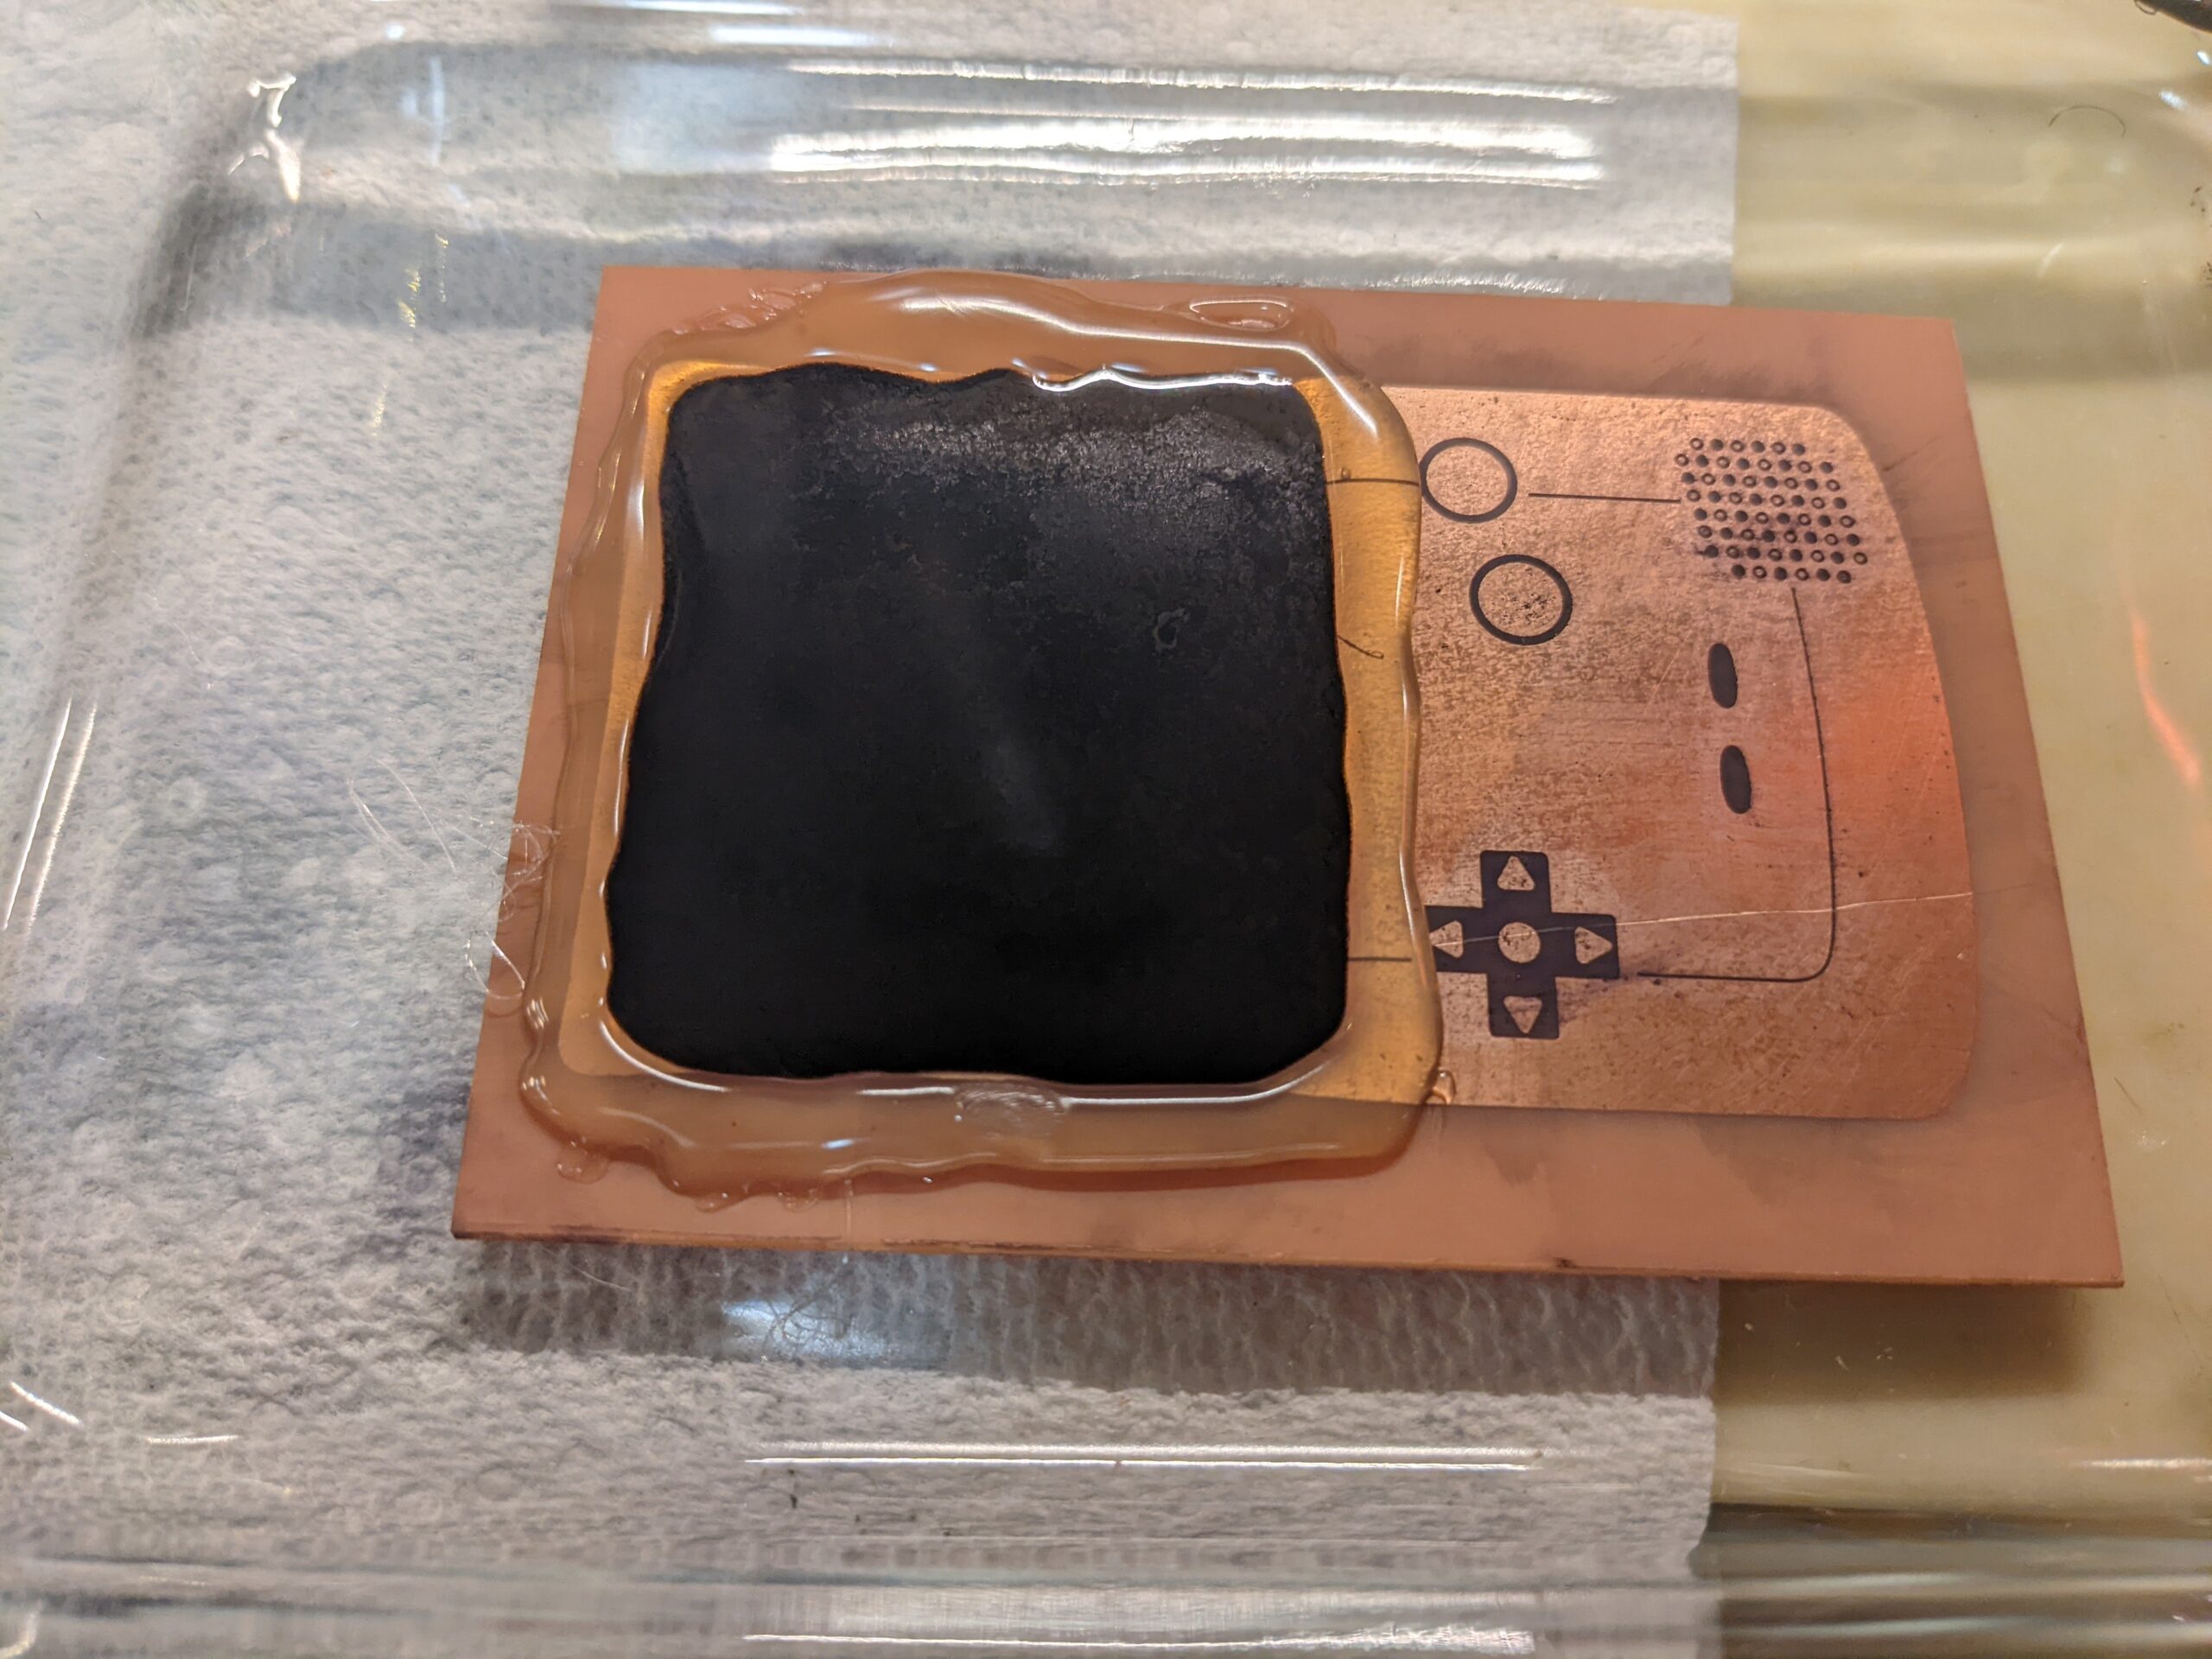
- If dyeing the whole board, submerge in the soup
- Cover the container and allow to sit for up to 8 hours
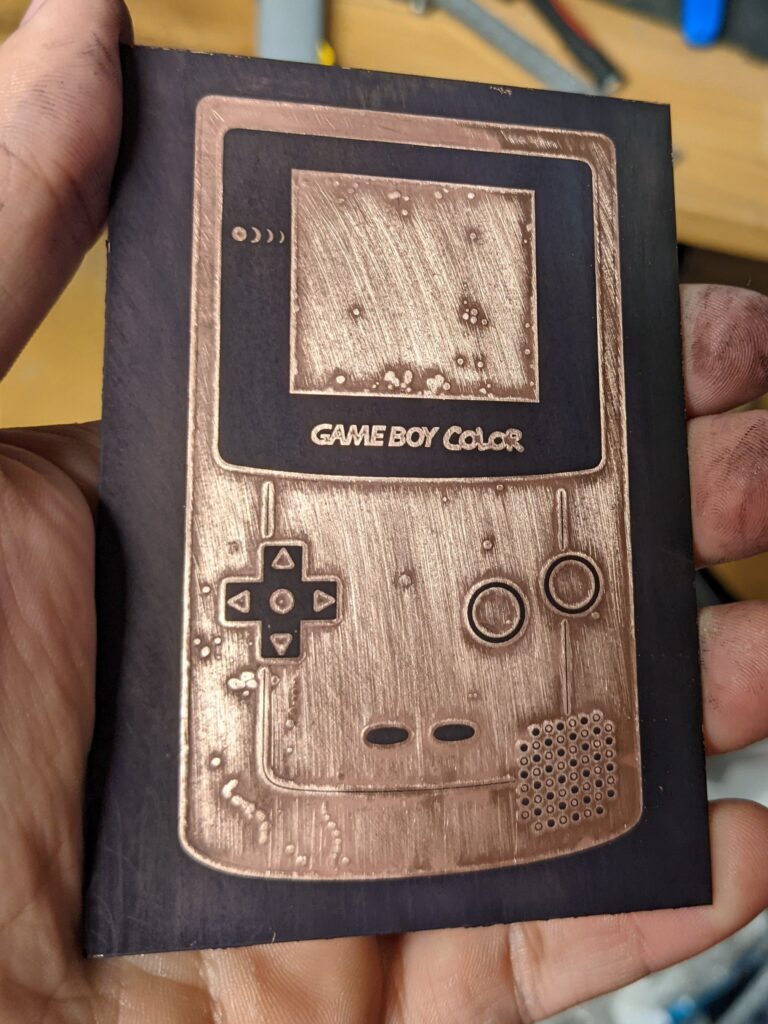
- Rinse thoroughly in cold water. There will be a crust settled on the top of the board, scrub gently to remove
- (optional) remove the hot glue dam with a razor blade
- Scrub board with an alcohol soaked paper towel until it comes away mostly clean
- The rit dye will have caused the copper to have some surface corrosion, this can be cleaned up with sandpaper.
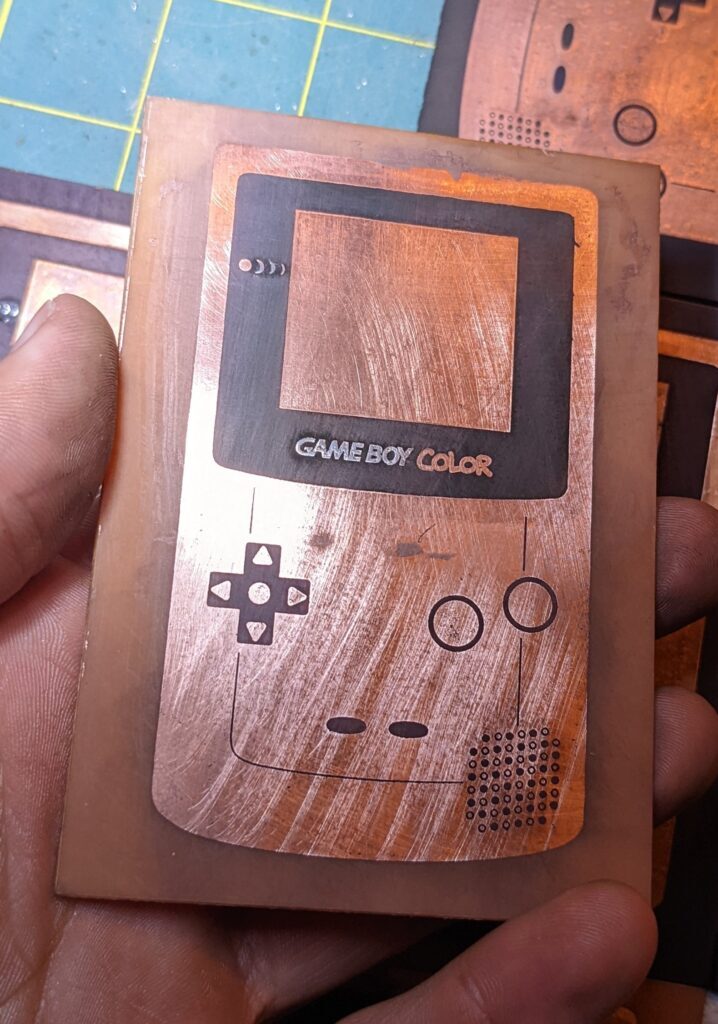
Try not to buy literally the cheapest garbage copper clad btw. It sucks when you blow right through the copper while sanding.